QA Quality Check Tutorial
Enter the QA Check Tool
- After you finish editing the game metadata and upload the game project .zip, click "Preview with QATool" to open the QA tool interface.
QA View Introduction
- The left side is the game simulation window. At the top you can switch between PC and mobile simulation.
- The bottom-left shows the SDK runtime logs.
- The right panel contains settings and test items.
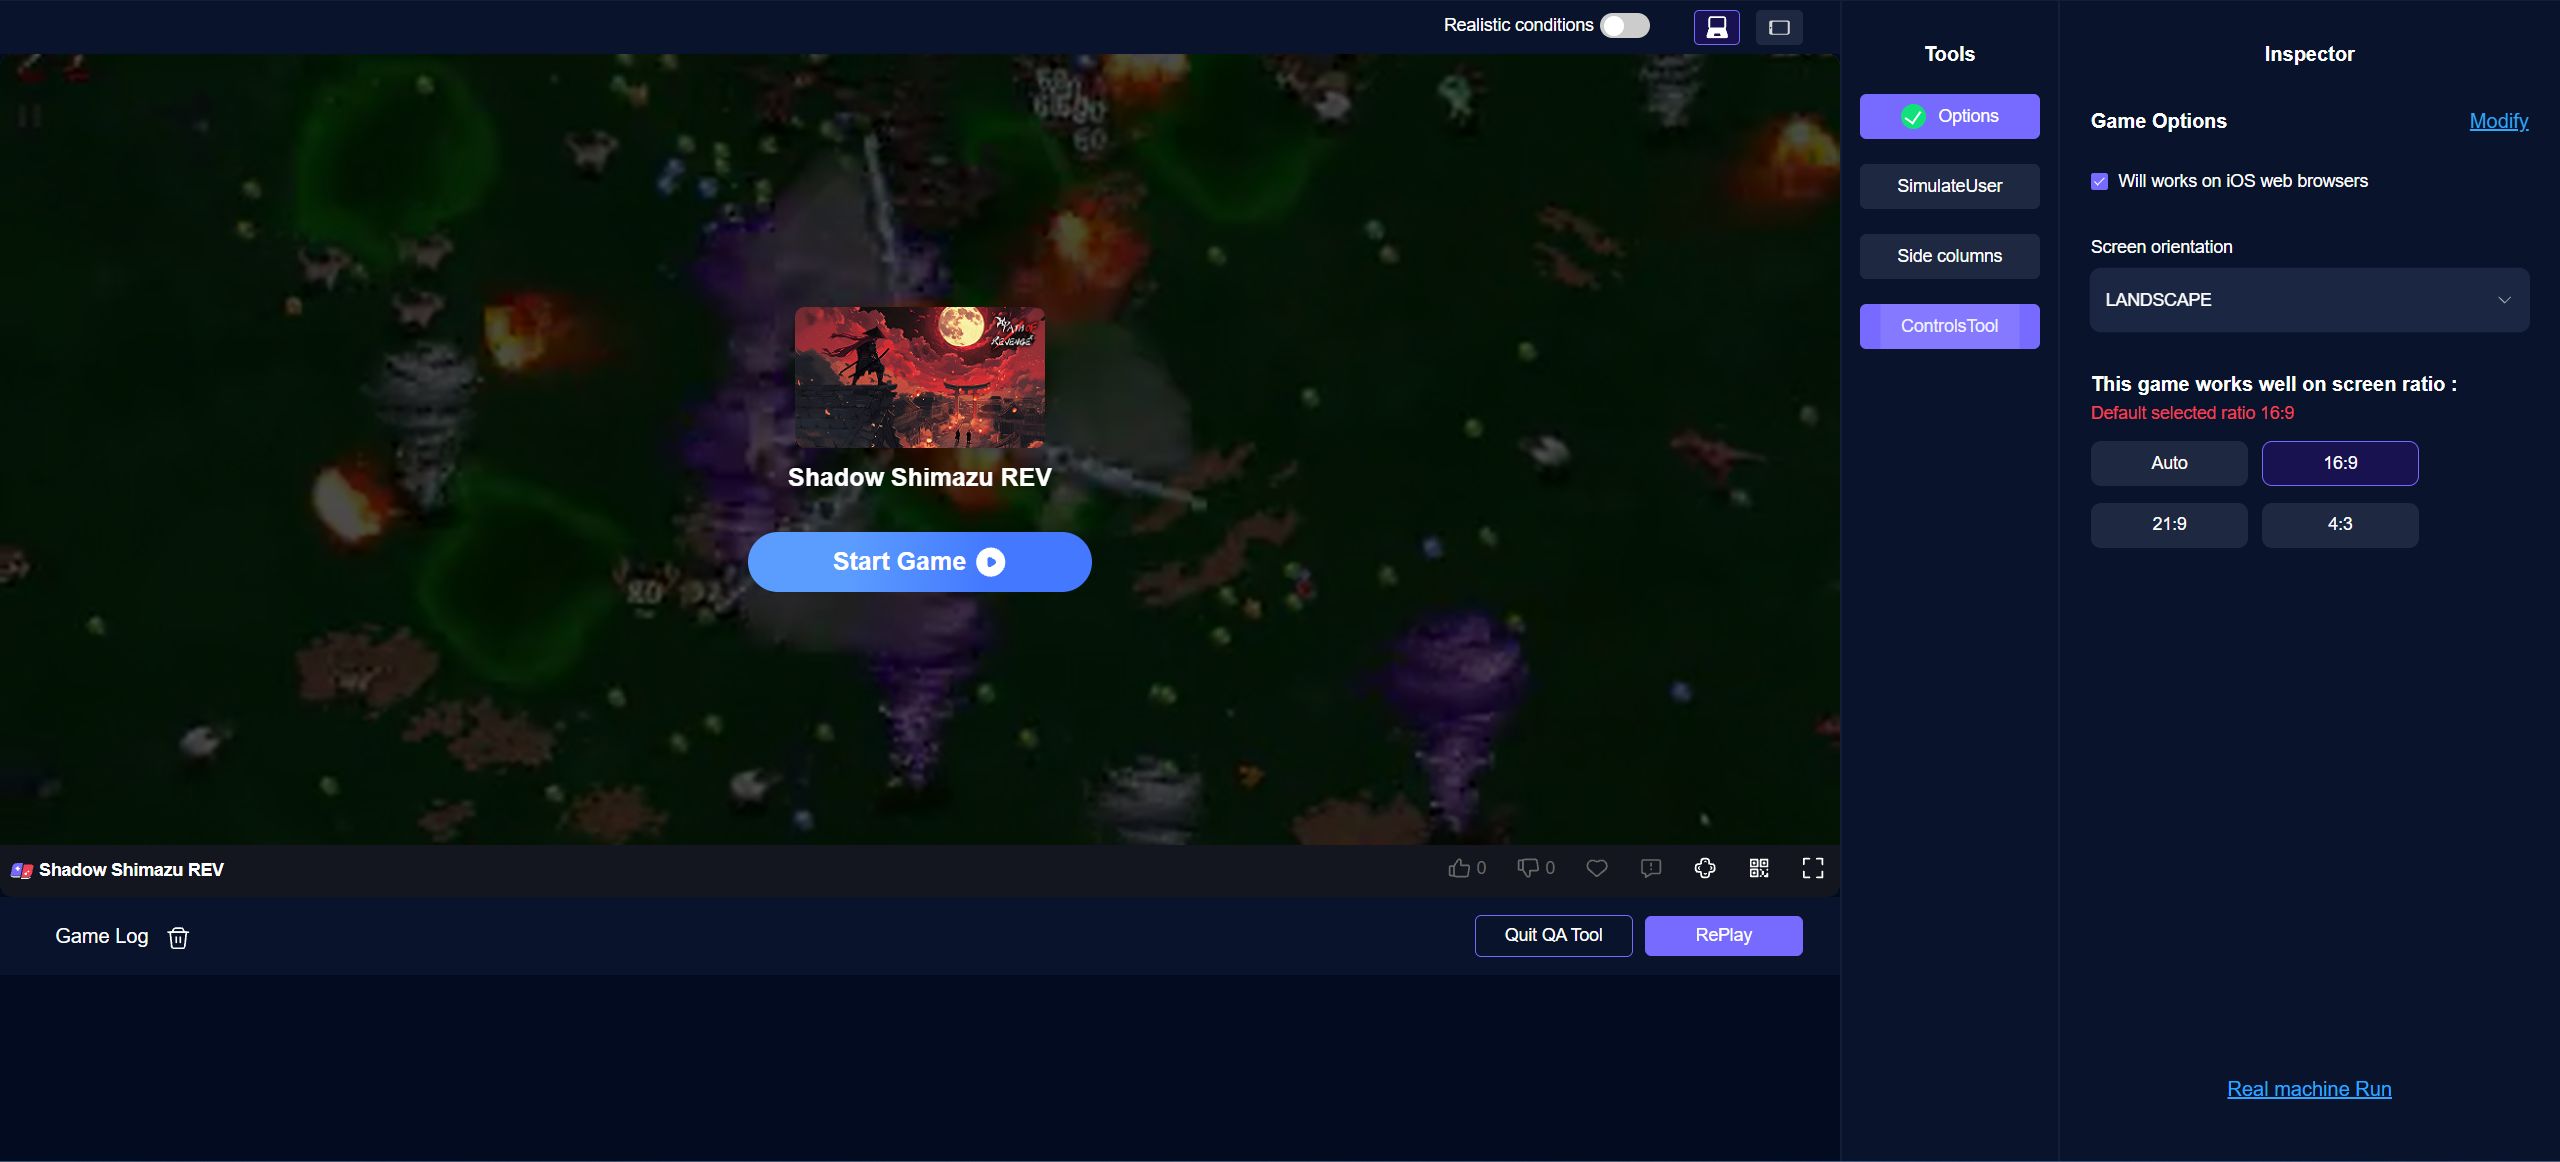
Tool Menu – Options
Game settings can only be edited after clicking the Modify button on the right.
- Only disable “Support iOS Browser” if you intentionally want to prevent your game from running on iOS devices.
- Choose the screen orientation your game supports:
- PORTRAIT: portrait only.
- LANDSCAPE: landscape only.
- BOTH: auto-adapts to both orientations.
- Game video aspect ratio:
- 16:9 → recommended default.
- 21:9 → black bars on both sides; only pick if your mobile game was designed for this ratio and has no adaptive UI, otherwise avoid.
- 4:3 → for old PC or retro TV-Game titles.
- Auto → best user experience if your UI anchors stretch correctly from 4:3 to 21:9.
- Real-device run: click to show a QR code; scan with your phone to test on the actual device.
Tool Menu – Simulate User
- If your game behaves differently per user, add team members in the developer backend and switch accounts here to simulate each user.
- Real environment simulation: when checked, real user-auth logic is used.
Tool Menu – Sidebar
- Game displays correctly: since the platform cannot always judge visual correctness, select “Yes” if you confirm the UI looks fine.
- Below are verification tests for SDK interface calls. Trigger these interfaces while playing. For example, if you use ads, click an ad in-game to confirm the ad interface is connected.
Tool Menu – Controller Tool
- Enable this tool only after the game is running; edit while playing.
- Choose how virtual buttons scale with the screen:
- By width: stretch to match game width.
- By height: stretch to match game height.
- Uniform: preserve aspect ratio while scaling.
PC-to-Mobile Adapter
- For PC games ported to mobile where you don’t want to implement separate on-screen controls.
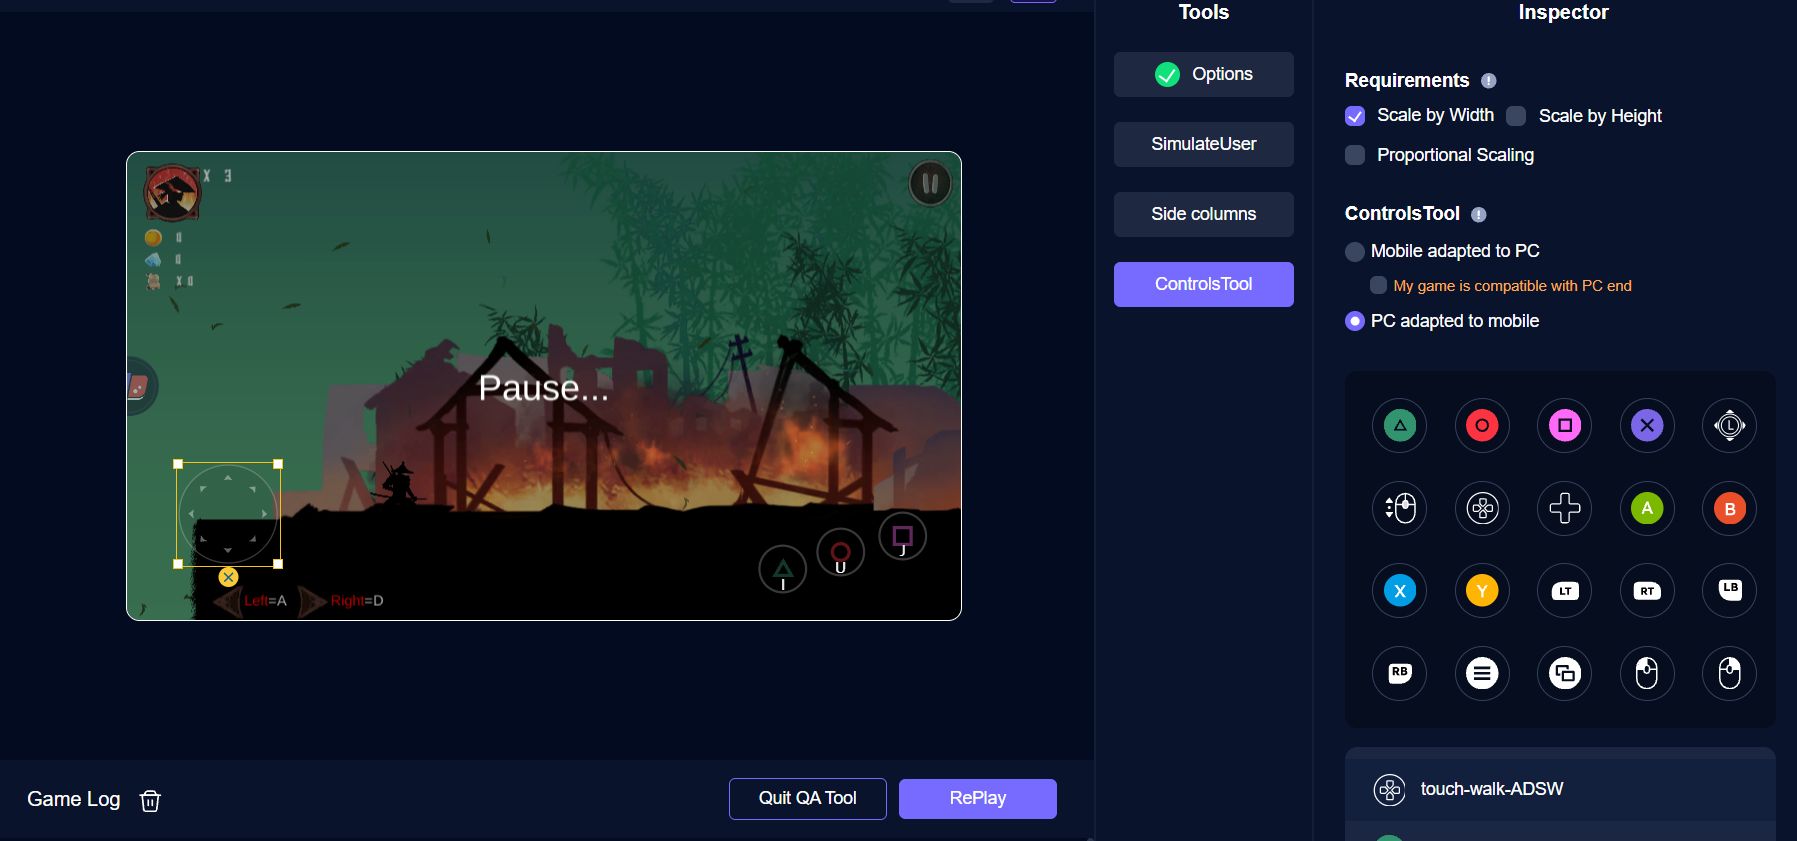
- Basic virtual buttons:
- Click (or drag) any button to create it.
- Press any keyboard key to map that key’s down event to this button.
- Special buttons with fixed keys:
- D-pad: maps to arrow keys ↑←↓→; adjacent directions can be pressed together.
- 8-way pad: maps to WASD; used for most game movement.
- L-stick: simulates right-stick mouse-aim in FPS; moving it sends mouse-delta events.
- Scroll wheel: simulates mouse-wheel scroll.
- Left / Right mouse: simulate left/right mouse clicks.
Mobile-to-PC Adapter
- For mobile games ported to PC where you don’t want to add keyboard/mouse support.
- First confirm your game already works on PC: some mobile titles use touch events instead of click events. Run the game in the right simulator; if clicking buttons or dragging items already works, check this option. If clicks/drags fail, leave it unchecked. The adapter will handle the rest.
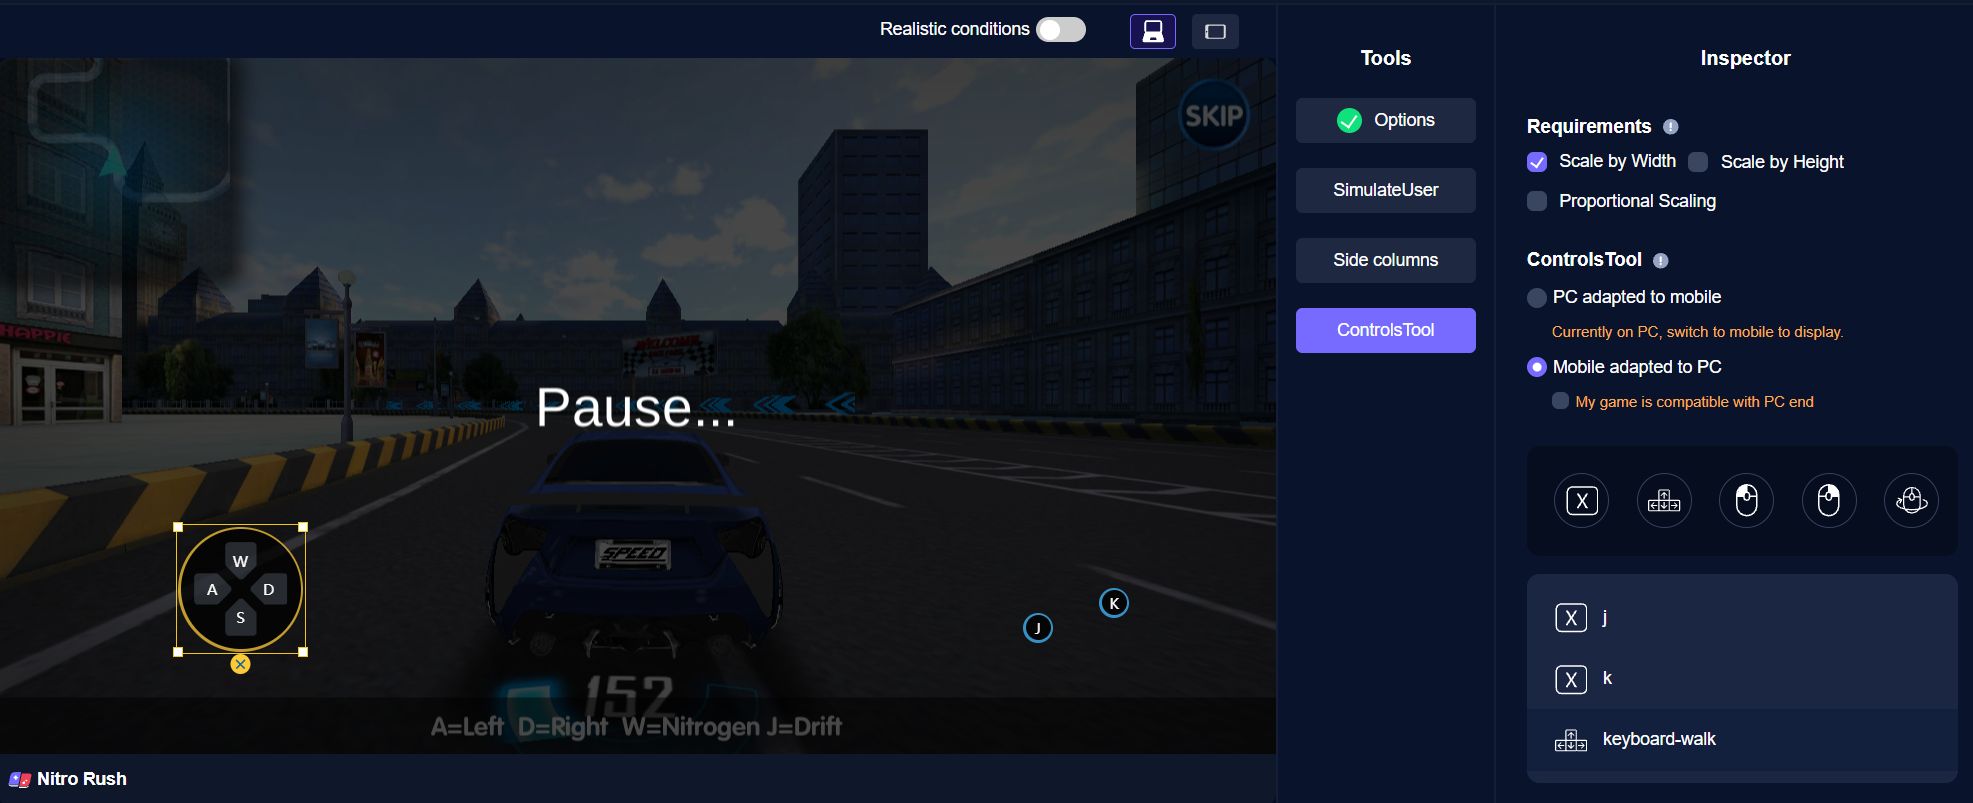
- Single-click key: assign any keyboard key; pressing it equals one tap at the mapped position.
- Directional keys: assign 4 keyboard keys; adjacent keys can be pressed together. Replaces on-screen joysticks.
- Left/Right mouse events: clicking the assigned mouse button triggers one tap at the mapped position.
- Mouse-look event: for games that rotate view by dragging. Place the circle over the original drag area; mouse movement will simulate view pan/rotate.
- Precisely position event keys over the original UI buttons/touch zones.
Adapter Parameters
Positioning widget: shows current screen position; adjust the button’s location and anchor axis separately.
Input description: always add at least an English description stating what the button does (e.g., “Press R to fire”). If your game supports multiple languages, provide matching descriptions for each.
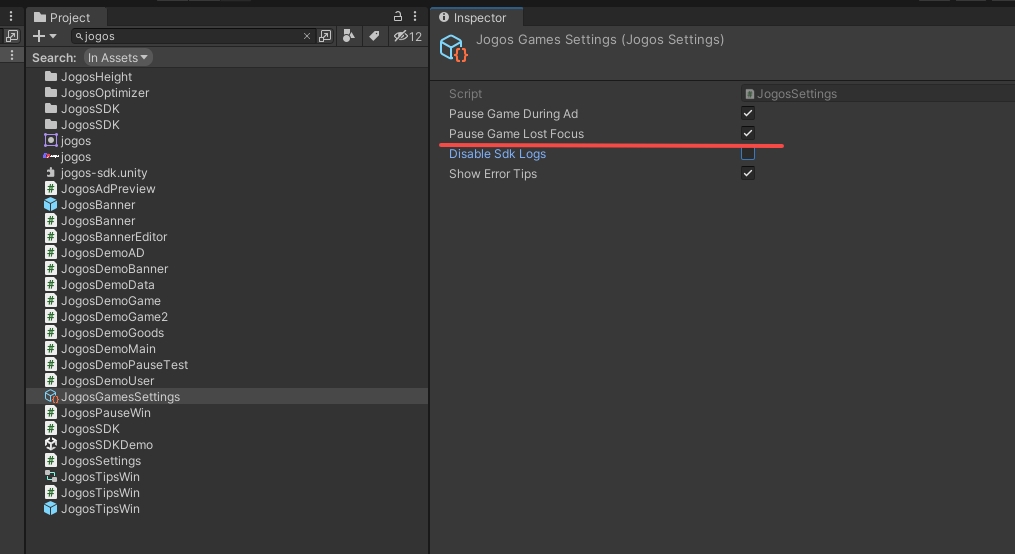
Additional Notes:
- In Unity use the SDK’s default config so the SDK automatically pauses the game when it loses focus and mutes audio during ads—unless you have your own pause/mute logic.
- In Cocos the latest SDK auto-pauses and mutes when focus is lost or ads play.
- For other engines, manually pause real in-game time and mute audio when the “game stop” interface is called, and resume time and audio when “game start” is invoked.